Christmas 2013, I spoiled myself and purchased the Teresa Collins Craftwell eBosser. I say spoiled because I already owned a Spellbinders Grand Calibur and a Provo Craft Cuttlebug, both of which I LOVED LOVED LOVED. So, the addition of an eBosser was really being a bit of a scrapbooking-papercrafting-aholic thing. When I purchased my new toy on Black Friday my dear hubby, asked which toy I would be giving up since I did not have the space for an additional item..... to which I told him none. Fast forward almost a year, I have sold both my Grand Calibur and my Cuttlebug - after getting the eBosser, both sat unused. Now, if you follow my blog at all, you will know that I gave a review of the Grand Calibur and my love for that particular machine. And everything in that is true, however, the eBosser has managed to take a good thing and make it awesome-sauce good. Why? Well, the eBosser has all the awesome features of the Grand Calibur IN ADDITION to being able to use Steel Rule Dies - AND the WRMK/Lifestyle Crafts Letterpress. So here are the reasons/lists of things I love about the eBosser.
1. 8.5x12 platform, with 8.5x12 embossing folders available
2. Compatible with ALL industry dies and embossing folders including Sizzix Originals, AccuCut, Spellbinders, Wafer Dies, etc.
3. Has an automatic reject feature - if your sandwich is too large it will automatically reverse and spit the sandwich back out....
4. Electronic - after 17 years of playing the Piano, my wrists begin to hurt with a lot of cranking.
5. It cuts my Cheerylynn Doily Dies like butter without a lot of rotating and blah blah blah.
There are some potential downsides:
1. A little noisy - small children who are light sleepers may be bothered.
2. Heavy
3. Electronic - so if you go to crops, in combination with #2 you may be a little irritated.

Sunday, July 20, 2014
Saturday, February 15, 2014
What's This?! A Bird, A Plane, A LAYOUT!
Just popping in really quick to share with you a layout that took me ages to create, and ages to post. This layout was started in one home and finished in another home. It is also evidence of my on going attempt to finish up the photos taken while on vacation in New Orleans, last summer. Anyway, here it is:
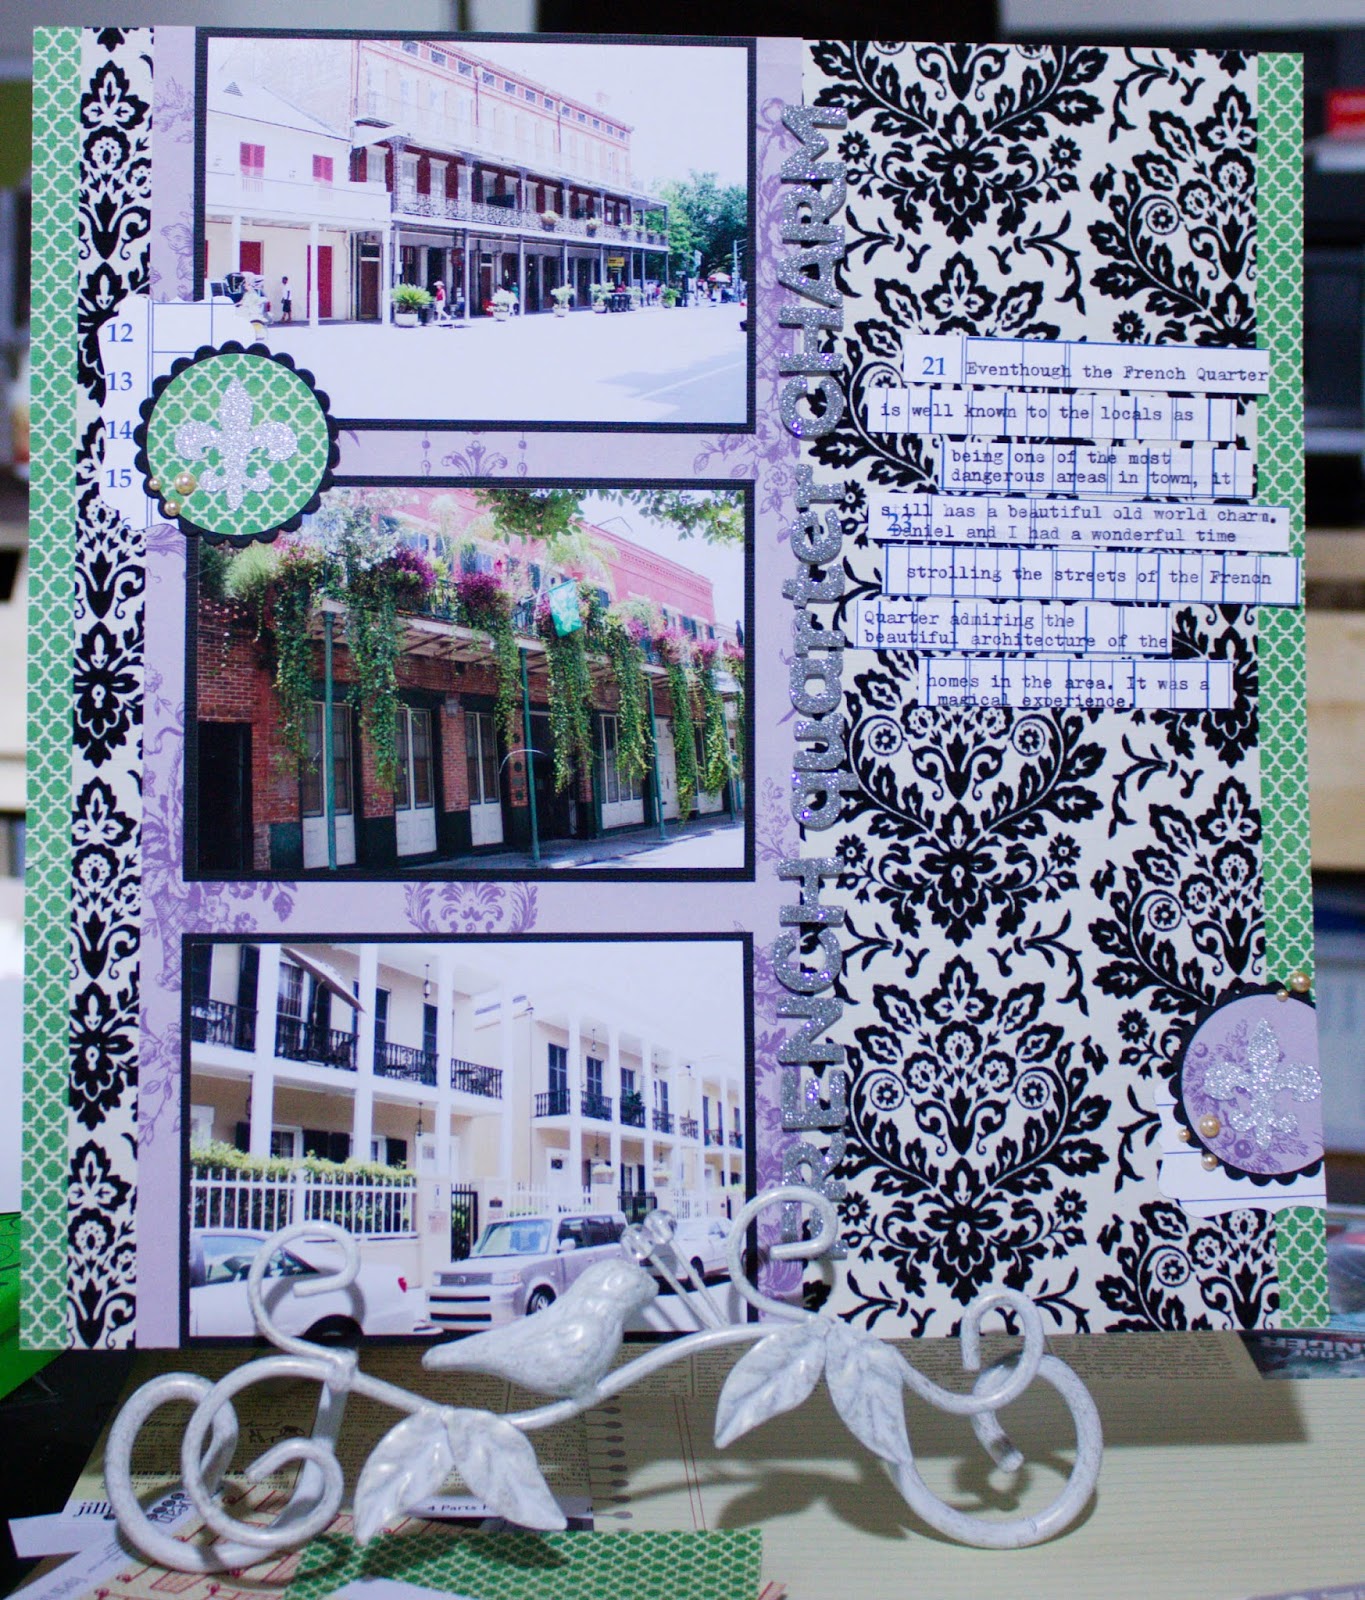
The layout is based off of a Northridge Media sketch they had up recently for a magazine call. I wasn't sure if the colors would work together although they work together all the time in New Orleans. And yet it worked out lovely! AND I got to use up some really old papers in my stash. Score.
Supplies: Karen Foster Designs, GCD Studio, Jillibean Soup, Basic Grey (Pattern Paper); Bazzill, Die Cuts With a View Glitter (Cardstock); American Crafts (Letter Stickers); McGill (Punch)
Monday, February 10, 2014
And Some More PaperTrey Ink Cards
I have been so inspired by all the happenings at PTI that I ended up creating several cards, with a more masculine theme. That and I had a lot of extra tissue paper sitting in my craft space, so I took the opportunity to use up a piece of tissue paper and perfect a technique..... Anyway, here are some more fun cards, based off one of the sketches provided by PTI, which you can find in this post. Be prepared, it's a long post, and WELL WORTH IT. Okay, okay, so the real reason you stopped by:


 Yummo right? I am in love with this technique, the simple texture that it gives, and a nice elegant feel to rugged cards. Love. In case you are wondering, all of the stamping was done using the Masculine Motifs stamp set from Papertrey Ink, I LOVE that set. Thanks for stopping by!
Supplies: Stampin' Up! Soft Suede, Bazzill (Cardstock); Stampin' Up Old Olive, Stampin' Up! Pacific Point, Stampin' Up! Baked Brown Sugar, Stampin' Up! Always Artichoke, Versafine Archival Ink (Ink); Papertrey Ink Masculine Motifs (Stamps)
Supplies: Stampin' Up! Soft Suede, Bazzill (Cardstock); Stampin' Up Old Olive, Stampin' Up! Pacific Point, Stampin' Up! Baked Brown Sugar, Stampin' Up! Always Artichoke, Versafine Archival Ink (Ink); Papertrey Ink Masculine Motifs (Stamps)
Sunday, February 9, 2014
Its A Post AND A Card!
Okay, okay. I admit it I've been a HUGE slacker, and what can I say other than, Life has been calling me and I have been answering? And with that said, after weeks and weeks of not being able to play, I had a chance to sit down and play with some paper. To get my creative juices flowing, I have been joining in on the fun over at Papertrey Ink and their 7th Anniversary fun. As part of that fun, I created the following card:
 Fun right? The challenge was to use both a color scheme and sketch from those provided in a nifty little handout. I got to use one the first stamps I EVER purchased from PTI, and remains to this day to be one of my favorite. If you are able to see the ever so slight detail, I also tried a technique called Faux Silk, which is really adhering crinkled tissue paper to a piece of cardstock. And I love it, such a lovely subtle texture. That's it for now, thanks for stopping by!
Supplies: Mehndi Medallion, Inside and Out: Birthday (Papertrey Ink Stamps); American Crafts (Ribbon); Bazzill (Cardstock); Stampin' Up Crushed Curry, VersaFine Black (Ink)
Supplies: Mehndi Medallion, Inside and Out: Birthday (Papertrey Ink Stamps); American Crafts (Ribbon); Bazzill (Cardstock); Stampin' Up Crushed Curry, VersaFine Black (Ink)
Saturday, November 16, 2013
A First For Everything
Recently as a result of so many life changes in such a short span of time, I decided I needed and was well over due for some quality me time. Being the avid crafter that I am, I made the decision to attend my first scrapbooking class offered by a LSS. *GASP* I know for many of you this may not seem like a big deal, for me it. is. huge. And because it was such a huge decision, I went big, and attended a class taught by Heidi Swapp. It was such a fun time, Heidi is a wonderful and gracious teacher full of energy and just general awesometasticness. And because I am a slow poke, this has not been posted sooner because the project was definitely not complete by time it was time to pack up and say goodbye. I have to say, I have completed it, and here it is:


I have to say for a first class, I choose wisely. It was such a blast, and I learned so much new stuff on how to work with spray mists. Believe it or not, this entire mini is made from techniques learned in the workshop using Heidi Swapp Color Shines and the Pink Paislee Color Wash line. Even better, I have a ton of left over supplies - so keep coming back because I will have a post soon (maybe) about what I did with all those delicious leftover bits and pieces.


I have to say for a first class, I choose wisely. It was such a blast, and I learned so much new stuff on how to work with spray mists. Believe it or not, this entire mini is made from techniques learned in the workshop using Heidi Swapp Color Shines and the Pink Paislee Color Wash line. Even better, I have a ton of left over supplies - so keep coming back because I will have a post soon (maybe) about what I did with all those delicious leftover bits and pieces.
Thursday, November 14, 2013
Long Stories
I was recently listening to the Paperclipping Roundtable, when one of the panelists (Karen Grunberg) shared a current project she was working on. The episode is Meditative Exacto Knives. Her sharing of her thoughts resulted in an instant flood of ideas - some of which I have and are waiting patiently to move from my mind to paper. However, today I thought I would share the two layouts I have completed as a result of her inspiration. Karen had shared working on some 6x12 layouts, and a discussion ensued on the PRT about how that would be executed. I recently got a new large format printer, which added to the ways in which I could take text heavy stories into my layouts. Here are two different ways in which I ended up executing this idea:
 This first layout was kept rather simple. I have to admit though, It does not feel quite finished to me so I may go back to it in a bit and add more. This is a very personal layout, sharing my feelings and thoughts about what a photo of my husband going through a Radiation Therapy Planning Session does and doesn't show about our lives right now.
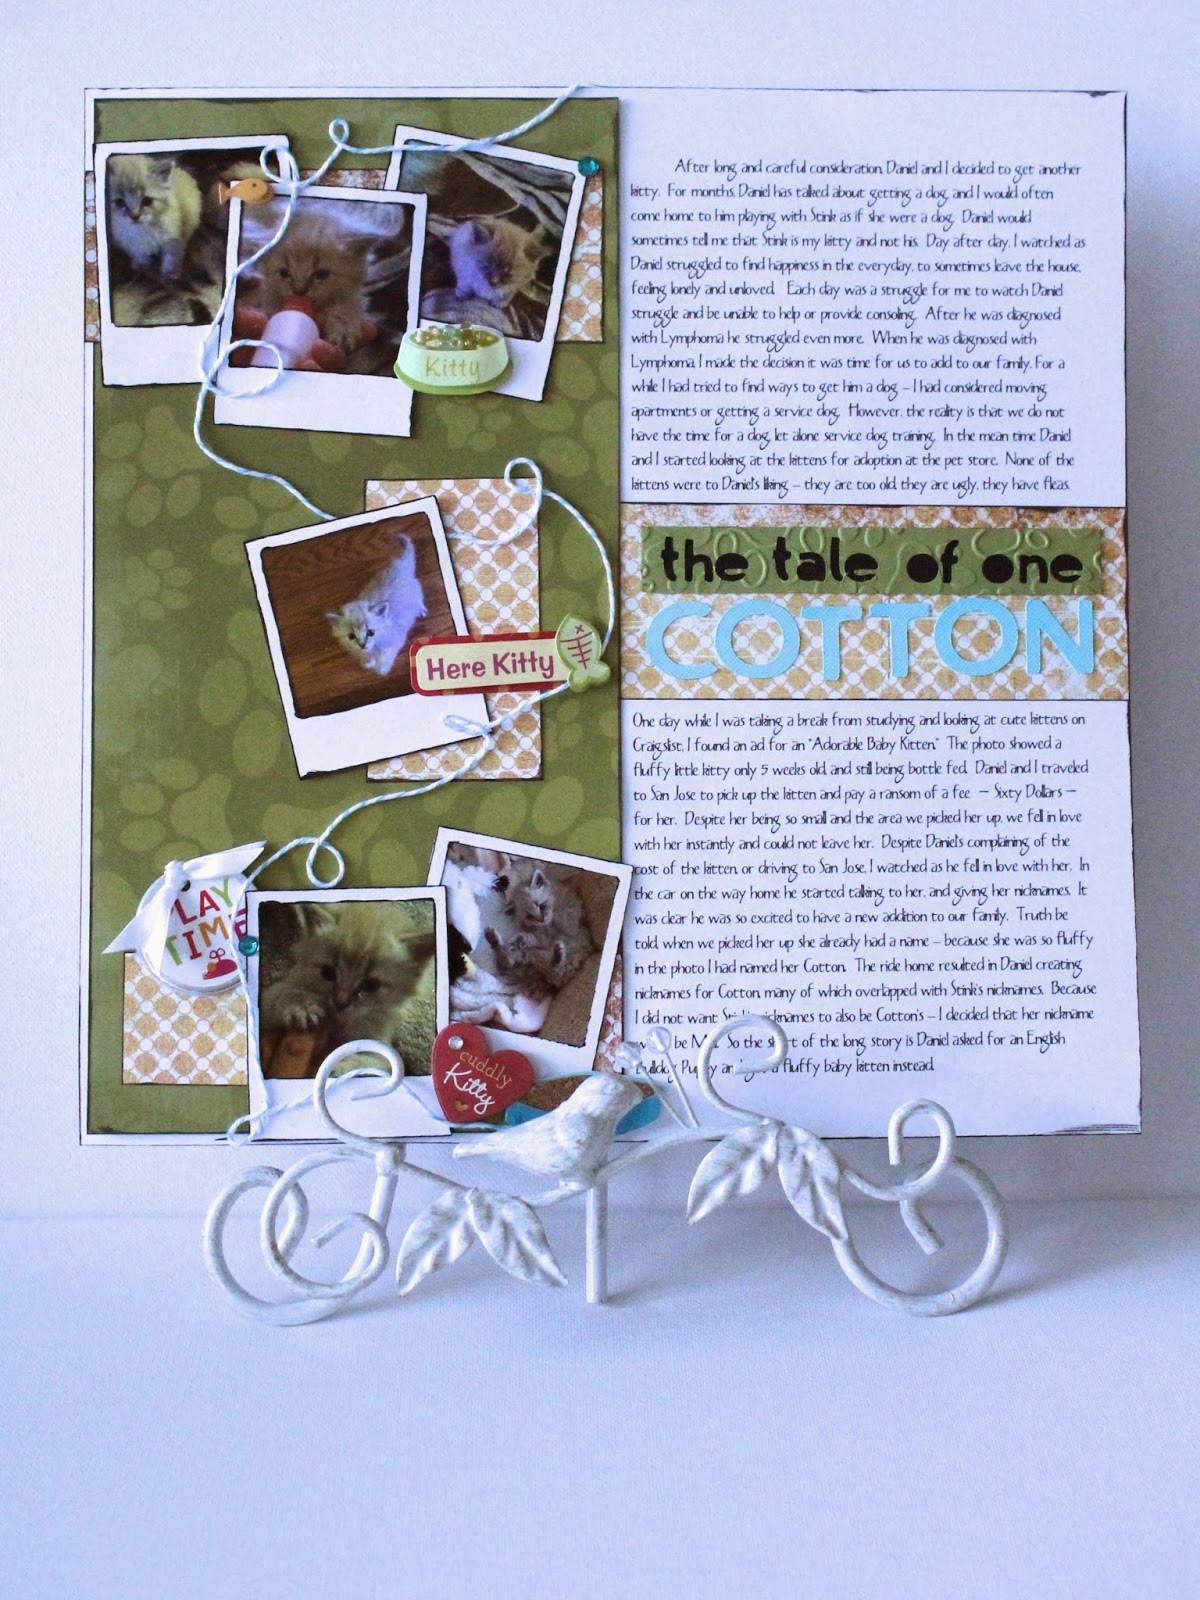
 This layout is a more traditional take and interpretation of the idea that Karen shared on PRT. One side 6x12 side is text and the other is the layout. I had wanted to use many photos of the new kitten my husband and I recently got. This story is very related to the story in the first layout - I wanted to document the reason why we got a new kitten and how we got the kitten, the story of adding to our family.
And that is all for today.

And that is all for today.
Friday, September 27, 2013
Layout: After Snowfall
Hello! Today I want to share with you a layout that I created incorporating some beautiful metal pieces I ordered a while back. When my order of lush metal arrived, I showed my husband and he said "Hey! Those look like Snowflakes, I bet you could use them like snowflakes on a layout." So, I have to say that my darling husband helped me find the inspiration for this awesome layout. And here is the layout:
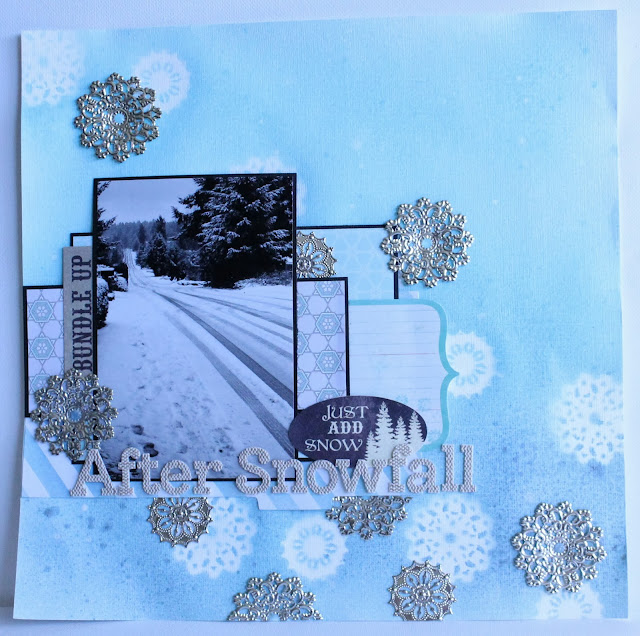
You cannot see it well in this particular photo (I am not sure why this photo looks a little dark), but the background has an ombre/gradient effect with the top portion being a light blue and the bottom third being a steely blue. I got this by placing the metal upside down on a piece of plain white cardstock. I then sprayed the top portion with a light blue glimmer mist (Patina), took the sprayer from the Patina bottle and placed it in my bottle of Twilight glimmer mist (because the sprayer on the twilight is plugged) and sprayed the bottom portion with the Twilight glimmer mist. Although switching the sprayers was very irritating, I think it turned out really well. Once the background was dry, I took the metal pieces off and flipped them over and used them as an additional layer of snow flakes to create a foreground/background look. In order to add the mood and feeling of a snow day, I matted the pattern paper and photo in black cardstock. And here are some close ups (with a more true color as well):


I hope you have enjoyed my share today. If you like the metal, pop on over to my friend's shop and splendor in all of her beautiful metal for crafty projects. http://www.zibbet.com/ButterBeeScraps
Supplies: (Cardstock) Bazzill Basics White, Bazzill Basics Raven; (Pattern Paper) Stampin' Up! Winter Frost Designer Paper Stack, Heidi Swapp Album Tabs; (Embellishments) Echo Park, My Mind's Eye, Silver Filligree Embellishment #167S-P, Silger Filligree Embellishment #286-P; (Letters) Little Yellow Bicycle; (Ink) Tattered Angels Glimmer Mist Patina, Tattered Angels Glimmer Mist Twilight, Studio Calico Mister Heuy's Opaque White

You cannot see it well in this particular photo (I am not sure why this photo looks a little dark), but the background has an ombre/gradient effect with the top portion being a light blue and the bottom third being a steely blue. I got this by placing the metal upside down on a piece of plain white cardstock. I then sprayed the top portion with a light blue glimmer mist (Patina), took the sprayer from the Patina bottle and placed it in my bottle of Twilight glimmer mist (because the sprayer on the twilight is plugged) and sprayed the bottom portion with the Twilight glimmer mist. Although switching the sprayers was very irritating, I think it turned out really well. Once the background was dry, I took the metal pieces off and flipped them over and used them as an additional layer of snow flakes to create a foreground/background look. In order to add the mood and feeling of a snow day, I matted the pattern paper and photo in black cardstock. And here are some close ups (with a more true color as well):


Supplies: (Cardstock) Bazzill Basics White, Bazzill Basics Raven; (Pattern Paper) Stampin' Up! Winter Frost Designer Paper Stack, Heidi Swapp Album Tabs; (Embellishments) Echo Park, My Mind's Eye, Silver Filligree Embellishment #167S-P, Silger Filligree Embellishment #286-P; (Letters) Little Yellow Bicycle; (Ink) Tattered Angels Glimmer Mist Patina, Tattered Angels Glimmer Mist Twilight, Studio Calico Mister Heuy's Opaque White
Subscribe to:
Posts (Atom)